Concrete Christmas Decorations
Holidays are just around the corner. In most homes there are already Christmas trees and in the shops you can get various Christmas decorations. Unfortunately, these are the quintessence of kitsch and trash – worn chains, polyester socks for gifts, balls with falling brocade and plastic Christmas tree branches. How to give our interior a festive X-mas character and at the same time ensure that it is still stylish and unique? When so much decor is made from plastic, it’s nice to have a natural and organic form in your home. Architectural concrete or decorative concrete comes in handy. You can conjure up beautiful concrete Christmas decorations that will blend in perfectly with the modern interior.
We will show you today how to create original Christmas decorations made of architectural concrete in a simple and cheap way.
What will we need to make concrete Christmas decorations?
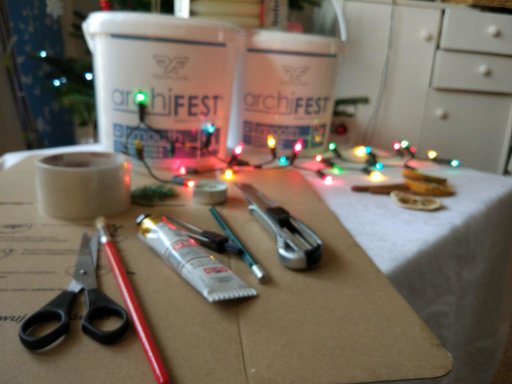
The basic material for our concrete Christmas decorations will be architectural concrete. In our shop you can get a special concrete mix ArchiFEST in a smooth version (ArchiFEST Smooth) or with larger aggregates (ArchiFEST Classic).
We have decided to use a smooth version that will be better suited for small forms.
In addition to concrete, we will need:
– hard cardboard
– plastic cups in various sizes
– magazine cover
– silicone cake molds (available in every supermarket)
– a compass
– line
– brush
– acrylic paint, e.g. gold, copper or silver
– fine sandpaper
– a cutter or scissors
– pencil
– adhesive tape
– table spoon
– wide jar
– weight for weighing the mixture components
– (optional) rubber gloves
Let’s get to work.
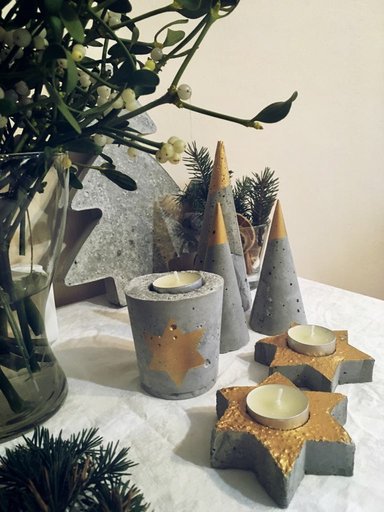
Star shaped candlestick
Concrete is perfect material for a candlestick especially since it does not burn so it is 100% safe.
A form will be necessary to make our candle holder. We start by drawing a base form, i.e. a six-pointed star on a hard cardboard. You can trace it from e.g. gingerbread molds or just like me using a compass and a ruler. Then, cut the star with a knife or scissors.
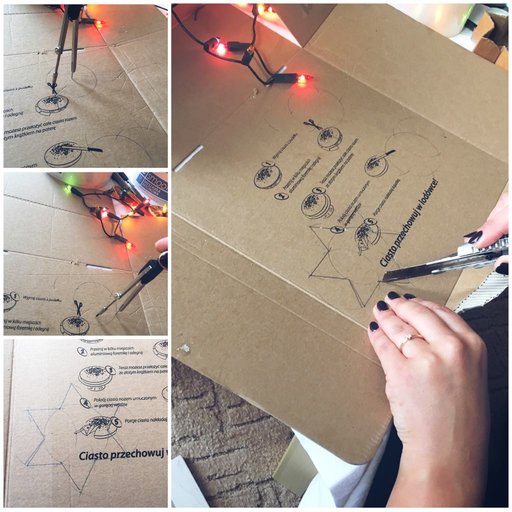
Then we need to cut the sides of the mold with a height of approx. 2 cm. Glue it together with adhesive tape, ensuring that there are no gaps through which concrete can then escape.

Then we prepare a concrete mix.
We measure 2 kg of the mixture and add 180 grams of water using the measuring cup attached to the package. We mix thoroughly.
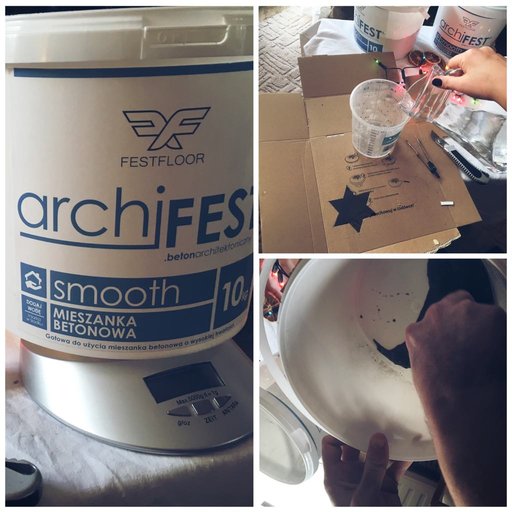
We pour the mixture into the molds and gently vibrate so that the concrete fills the form well.

Let the mold stand for about 20 minutes. After this time, place a candle into concrete that has already started to bind and push it gently. Wait another 20 minutes and take out the candle. The mold should have a recess.
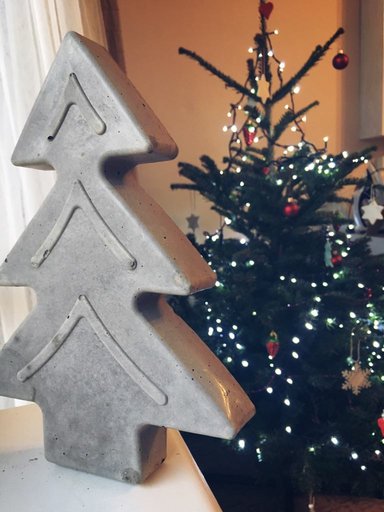
Concrete Christmas tree and gingerbread man
Another decoration piece is very simple, because you do not need to make a separate form. We use ready-made silicone cake molds here. Just fill the mold with a mix of architectural concrete and tap to fill the form well.

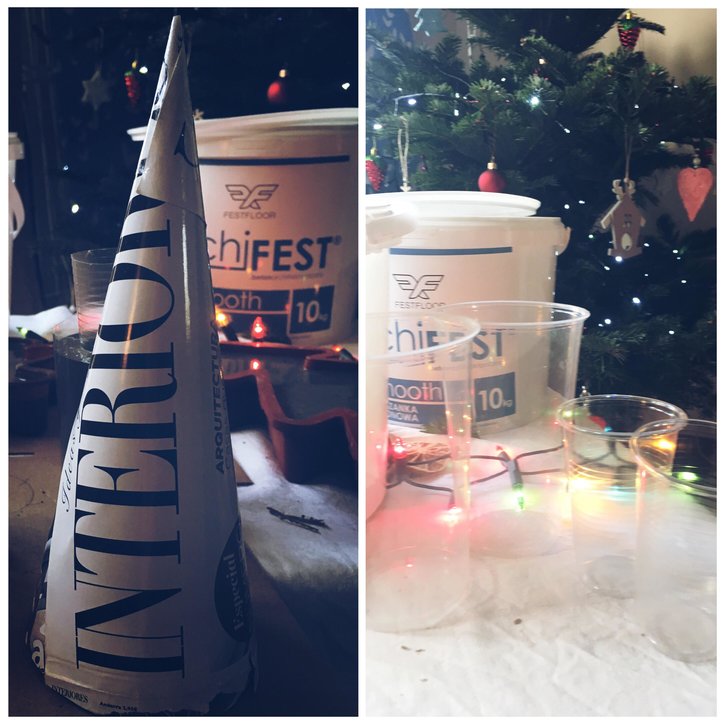
Concrete cone Christmas tree and round candle holder
The next two decorations are also quite simple. We create a template for a Christmas tree from a rigid magazine cover. Roll the paper into a cone shape. Secure and cover it thoroughly with a wide adhesive tape (this will prevent leakage and cracking of the form after pouring the concrete) and cut it down to be evenly fixed. If you decide to make several trees, try rolling the paper at different angles to create different shape trees and in a variety of sizes.
To make a round candle holder we only need disposable plastic cups.
Pour concrete into both forms. Put the cone upside down and place it in a jar so that the concrete does not spill and he could tie it.
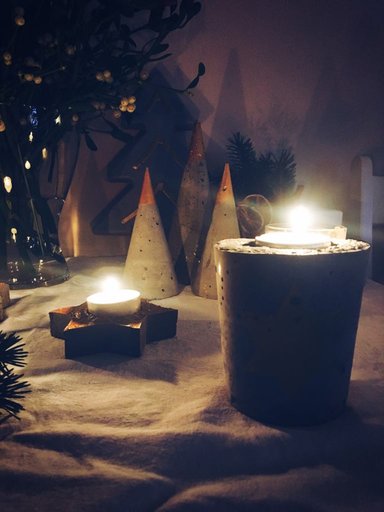
After 20 minutes take the form made of plastic cup and put a candle in the center (you can use either a tiny tealight candle or a large candle high). After another 20 minutes (or more if the hole is to be deeper), we take out the candle, just like we did with the first candle-holder.
Leave all the forms to bind for at least 24 hours.
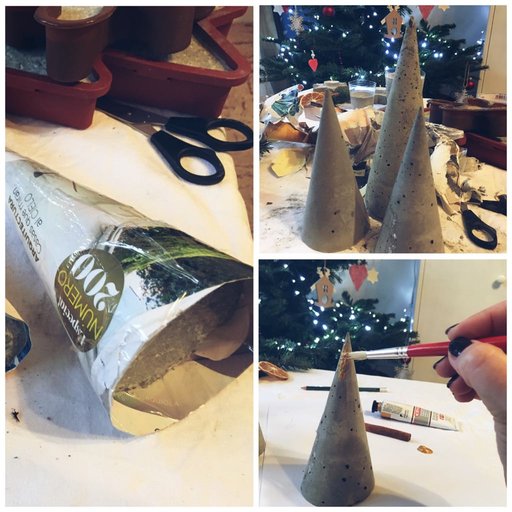
After this time, carefully remove the forms. If you have any rough edges you can sand them down to smooth it out with abrasive paper (80, 100 or 120).
Decorating
The next step is decorating our figurines and candlesticks. Acrylic paints in metallic shades of gold, silver or copper will work perfectly here. Concrete forms are beautiful and noble in themselves and do not really require a lot of beautification, so do not overdo it with the amount of decorations. To paint even shapes, you can cover the form with tape or stick a paper form to it.

That’s it! Merry Christmas!